Wednesday, December 24, 2014

Christmas Eve Is...(2014 Edition)

Dear Em,
Christmas Eve is...

This holiday season has thrown us for a little of a loop. You started our Christmas Eve home sick with an ear infection & strep throat. Instead of going to the pet store with Daddy to pick out gifts for the cats, Daddy went to the store & face timed you while he was there so you could help him make fun choices. A second electrician came to our house to look at our power outage situation, & after two hours we were able to say that we had stumped two electricians. Having the electrician there kind of threw our whole schedule off. I asked Daddy to pick up premade cookie dough from the store, because there was no way I would have time to make our really yummy cookies in time for you to leave them for Santa. We quickly sat down to eat dinner together before...

* Face timing & Opening Gifts with Dear Friends *


* Opening One Gift & Putting our Christmas Jammies On *


* "Baking" & Leaving Cookies & Milk for Santa & Veggie Sticks (we forgot to buy carrots) for Rudolph *


* Snuggling Together & Reading Christmas Classics Before Tucking Our Little All Snug in Her Bed *


* Getting to Work as Santa's Elves *


* Hanging the Stockings With Care *


* Leaving Notes from Santa *


* Saying Goodbye to Elfie Until Next Year (he stole a few snacks for the road) *


* And Drifting to Sleep on a Silent Night *


I love you so,
Mommy

Tuesday, December 23, 2014

I built a fort today

Dear Em,
One morning I was rushing around trying to get ready for the day. You popped into my room & excitedly proclaimed, "I built a fort today." I walked downstairs, & sure enough you had draped blankets over chairs. Although there wasn't much space, you still had a family of stuffed animal & baby doll friends with you in the fort.


For a moment, I forgot about what a rush I was in & reveled in your active imagination. When I'm with you, you never know where the day is going to take us. Every day is an adventure, and that's pretty stinkin' amazing.

I love you so,
Mommy

Monday, December 22, 2014

Our DIY Pinecone Christmas Trees


Dear Em,
You did so much crafting this holiday season. We made six shell heart frames & tons of Christmas tree pinecones. You were so excited to craft together in November, but when I told you we were finally finishing our last crafts in mid December, a look of relief spread over your face. You were ready for some Christmas movie down time.

The idea for the Christmas tree pinecones actually came a year ago. We went for a walk in a park in North Carolina & found giant pinecones littered everywhere across the park grounds. I remarked how much they reminded me of pinecones from the Redwood Forest in California & how they would be great to use in making Christmas crafts (which is probably because we had just made these). Your Nonnie agreed, & so the three of us spent the rest of our walk at the park collecting pinecones. We tried to pick large, straight ones. There were so many to choose from, & we ended up returning home with a big bag full.

That bag sat in our basement until a couple months ago. Not knowing exactly what kind of Christmas craft to make, I turned to Pinterest. If you type in "Christmas pinecone crafts," you will find endless ideas. I pinned a few ideas that would work with the giant pinecones we had & then asked you which idea you liked best. You chose to make glittery Christmas trees with a gold star on top.

We used:
- Large Pinecones
- Small Wood Stars
- Gold Paint
- Mod Podge (spray & regular)
- Gold & Silver Glitter
- Paint Brushes
- A piece of cardboard to catch the paint & glitter
- Wire Cutters (if you want to trim the bottoms of the pinecone)

While you painted the stars gold, we enlisted your uncle Jared's help with the pinecones. Some of them were crooked, & he trimmed the bottoms a little so the pinecones would stand a little straighter. Note to self, teenage boys (& maybe most males) do not enjoy making Christmas crafts like you & I do. Jared pretty much hated me 90% of the time I enlisted him to help out with our craft. Sorry, Jared.


While you painted the stars independently, you & I glittered the trees together. Using paint brushes, we generously covered the pinecones in Mod Podge, trying to get every crevice (we probably could have used spray Mod Podge & it would have been easier but then you wouldn't have been able to help as much). Once our pinecone was covered in sticky Mod Podge, we generously sprinkled a mix of gold & silver glitter (creating a champagne glitter look) all over the pinecone.


Later, I sprayed Mod Podge thoroughly all over the pinecones to seal the glitter onto the pinecones. After they all dried, I used a glue gun to fasten the gold stars to to the top of the pinecones. You & I both loved how they turned out. I mean, when you take an adventure at the park & add Mod Podge & glitter (it's still all over the house, poor Daddy), what's not to love?


I think our "trees" are such fun holiday gifts for some of the special people in our lives. I love them so much, we took a bunch for our home (since we made more than twenty, we were able to keep some for ourselves & still gift them to many of our friends & family & your teachers). I love the natural & festive elements they bring to our holiday decor. Looking at them & knowing that my almost five year old & I (& Uncle Jared, sorry Jared) made them together...I think they are going to make me smile for years to come.

I love you so,
Mommy

Friday, December 19, 2014

Flashback Friday: What a difference five years make


Dear Em,
I had planned on this being a Throwback Thursday post, but the days are just really getting away from me lately. Sigh. So, here we are with the blog's first Flashback Friday.

I cannot stress enough how quickly the past five years have gone by. The saying goes that time flies when you're having fun. I'm not saying every day has been sunshine & butterflies, but they've been the five best years of my life.

Five years ago, I was doing a lot of waiting. I was waiting for my family to arrive for the holidays, & I was waiting for you to be born. I could not wait to meet you, to put a face to all of my dreams. I was doing my very best to do anything that might coax you out. I tried to walk three miles each day. I ate eggplant parm. I drank smoothies of mango, kiwi, & pineapple. This was one of the first things in life that I couldn't make happen in my own time, & it drove me crazy. This was just the first of many lessons I would learn about losing control & finding beauty in things that don't go exactly as I planned.

You weren't born in time for Christmas that year, but a few days later I received the most amazing gift Daddy & I would ever receive...you. Now I have this imaginative, outspoken, bouncing, loving, bright, hilarious little almost five year old. What a difference five short years makes.

You ask me what I want for Christmas, & every year I give you the same answer. All I've ever wanted for the past five years is you. Your hugs & kisses & smiles & oohs & ahhs & snuggles & laughter bring more joy to mine & Daddy's Christmases than anything that could be wrapped & put under the tree.

I love you so,
Mommy

Wednesday, December 17, 2014

How (not) to make footprints in the sand


Dear Em,
I saw this post a few months back & got so excited. You & I are never happier than when we have sand between our toes. Could we really make your adorable, little footprints in the sand? With you turning five this year, I thought it would be incredibly sweet if we could forever capture your five year old feet & toes.

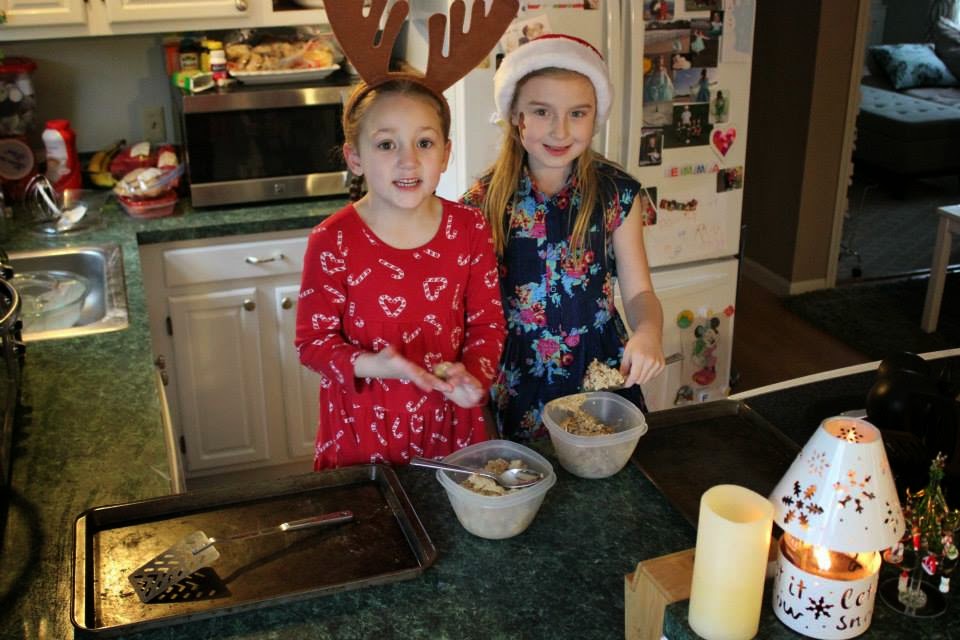
In order to get as close to five-year-old-ness as possible, I decided to make this around the holidays & include your best friend. I knew her parents would love her footprints in the sand too. I bought enough supplies for two.

We used:
- A sheet (I almost forgot to put one down before we started working & I cringe thinking of the mess that could have been)
- 2 Frames large enough to fit your footprints
- Sand (I bought it from the craft store to eliminate chances of sand fleas/creatures)
- Plaster of Paris (I used a 2kg bag for two frames, but would suggest buying extra if you haven't worked with it before)
- Water for making the plaster
- A piece of cardboard to smooth the sand (we grabbed it from our recycling bin)
- Spray Mod Podge Sealer

The first thing I did was lay down a sheet to catch the sand & plaster mess as we worked. I put our two frames on top of it. Not thinking about how the plaster would need 5 hours to dry, I lay the sheet down in a heavy traffic area of our home. That was my first rookie mistake. Trying to keep little feet & paws from knocking into the frames as they dried would have been almost impossible.

I removed the frames' cardboard backings & glass (the glass isn't needed). Next, I placed the backings on the front of the frames & flipped them over (this video tutorial might better explain). The directions in the original post said this makes a "nice box" to fill the sand into. Except, it is not a nice box. One bump or shift in the frame makes the sand spill out, & you have to fill & smooth the sand all over again. If I were to do it over again, I would have taped the cardboard backings to the front of the frames to create a loose seal.

I filled the frame with sand from the craft store, & used a piece of cardboard to level & smooth the sand (the directions says to fill to where the glass would have been but I missed that part & likely used way too much sand). Next came the hard part, catching your footprints. Your best friend went first. It took her only a couple times to make a nice impression with her feet, re-smoothing the sand each time before we tried a new print. I had to remind her to pick her foot straight up, slowly & gently. Once I was happy with her prints, I began mixing about 1kg of the Plaster of Paris per the instructions on the box.

I tried to pour the mixture gently & slowly (as was instructed in the post), but it's really hard to pour Plaster of Paris gently. It kind of globs down as it goes. I started in one corner & worked my way across the whole frame. Then I used a spoon to softly & gently level the mixture & ensure I had covered the entire frame. At this point I was really afraid I had ruined the whole thing, only I wouldn't know it for five hours, when it dried.

Then it was your turn to come to the next frame to make your footprints. I asked Daddy to begin stirring the Plaster of Paris for your frame as we worked on your prints. The problem is that slow & gentle are just not words that you understand. You stomped into the footprint making experience, making me reset the "nice box" each time time you banged the frame & sent the sand pouring out. After ten tries, your Daddy walked over to see if he could help guide you into more gentle footprint making, leaving the Plaster of Paris he was mixing to set in a bowl on our kitchen counter.

I don't know how many footprint making attempts there were. There were too many to count. During the last one, you somehow toppled over. Your hand landed in the best possible spot...right in the middle of your best friend's frame. Since we were supposed to be careful not to put too much pressure on the plaster, I was pretty sure your firm hand print right in the middle of it was the end of poor S's footprint. 

That was truly the perfect moment for your daddy to chime in. "Julie, something is wrong with this plaster," your Daddy referred to the Plaster of Paris he was supposed to be mixing. "Its not fluffy like the last time. It's really hard. I don't know what is wrong with it." I glared at your poor daddy. Nothing was wrong with it. It was doing what plaster does when someone is not stirring it (like he was supposed to). It hardens.

At this point I may have lost it a little. Plaster & sand covered our house. They were all over the frames, the sheet, the floors, the counters, & you. I may have run outside in the pouring rain & threw the sand & plaster contents of both frames into the woods. I'm pretty sure I returned with crazy eyes. "That's it! We're done! Everyone just go play someplace else!" You all ran away scared. I guess adults can sometimes throw tantrums too.


Except I really wanted your forever footprints in the sand. Sigh.

So, I cleaned up a little. I moved the sheet & the frames into a more secluded part of our house before refilling them with sand. Then I asked you & your best friend to come down one at a time to make your footprints. You did better the second time around (it only took five or six tries). After the footprints were done & you both had gone back upstairs to play, I mixed & poured the plaster one by one. I was still worried I was ruining the footprints as I poured the plaster, but I hoped for the best.


After five hours, I lifted up the frames to see the results. Sand poured out, & I had footprints...but they weren't the lovely & perfect footprints from the post I had originally seen. There were some markings in them & around them. The sand hadn't adhered to prints as evenly or as much as I would have liked (I think I had filled the frames with too much sand?). I sprayed multiple coats of large amounts of Mod Podge sealant, but it's not a sturdy seal. Sand continues to fall off here & there, sometimes in clumps, revealing pieces of the plaster. Instead of footprints in the sand, it looks like footprints in plaster with sand mostly covering them.


Our imperfect footprints hang in the Family Room. There are enough inconsistencies & areas that look a little wonky that it makes me & my type A personality a little crazy every time I look at them. I want to say that if I had to do it all over again, I wouldn't do it at all, but I know that's not true. Even as I write this now, I'm wondering if we tried it again if we would have better results. The possibility of having your little footprints frozen in time is just too much amazingness for me to let go.

I think what I really wish is that I had never seen the Sand Footprint Craft post at all. In this case ignorance would have been bliss for everyone, because I'm already thinking...maybe after the holidays...maybe we could try again.

You & Daddy should run for the hills.

I love you so,
Mommy

Tuesday, December 16, 2014

The Perfect Christmas


Dear Em,
It was a little more than two weeks before Christmas, & things were going really well. I was already done with my shopping. We had finished making most of our Christmas crafts. Our Christmas cards had been sent out. We had cookies to eat. We had Christmas movies to watch. I was excited to enjoy the holidays with our friends and family.

But things haven't quite gone exactly as planned...

First I noticed a check engine light in my car. After spending 4 days at a dealership, the good news was that my transmission was totally fine. The bad news was that a delivery vehicle had crashed into my car while it was in the parking lot. It doesn't look like I'll be getting it back any time soon.

Then our credit card was hacked into. We lost power in half of our house (we still don't know why). Then you spiked a fever. After a trip to the pediatrician, we learned that you have an ear infection & strep throat. I joked that this is what we get for finishing all of our Christmas preparations early. Sigh.


The thing is that while we lost power in half our house, somehow our Christmas tree is still lit. You are sick, but we still get to be together. Plus, we had plans to lay around & watch Christmas movies, & that is pretty much the perfect remedy for all of your ailments.


Our holiday season might not be exactly what we thought it was going to be, but Christmas doesn't have to be wrapped in a perfect bow to be the perfect Christmas. We have our friends. We have our family. We have each other. We have so much more than so many. We have everything we need & so much more. So this Christmas season we may move a little slower, but there will be joy & love & snuggles. You know what? I think it's going to be the perfect Christmas.

I love you so,
Mommy

Wednesday, December 10, 2014

Your 2014 Letter To Santa

Dear Em,
This past week you wrote & sent out your letter to Santa. It's such a sweet tradition to me. You had other thoughts. "But, Mom, I already talked to Santa & told him what I want." That is true. You got me there. I forget what excuse Daddy & I told you about why it was important for you to also write a letter, but we made something up that seemed to make sense to you.

You sat down at the table to make your letter. You wanted to start right off with the important stuff- what you truly want for Christmas. I asked you to be sure to include some pleasantries. You grumbled a little. You were hoping your letter could be short & sweet & you could write as little as possible.


What a difference a year makes. We didn't use rainbow letters at all. You sounded out & wrote each word on your own, checking with me first that the words were spelled correctly. You added your very own "family" of decorated trees, some snowmen, & a star. You had worked so hard, & I was absolutely dazzled by your work. You were pretty much over it. You just wanted to be sure that Santa knows you want matching Bitty Baby outfits more than anything. There are quite a few other things that you've mentioned it would be nice to have, but that's the one thing you really, truly want.


After school I took you to Macys so that we could put your letter into the big, red mailbox. They have such a cute little section of the store set up. The "Santa Mail" box made me smile. You put your letter inside & gave me a thumbs up, feeling absolutely assured that Santa would know exactly what you want for Christmas this year  (& lucky for you, I'm pretty sure Santa is on it).


This is our second year writing a letter to Santa. To you it's almost like a business transaction. It's just what you have to do to let Santa know what to leave under the tree, & you just want to make sure the big man in red knows what you're wishing for. To me, it's become such a fun & precious tradition that I truly cherish sharing with you.

What I didn't know about bringing your letter to Macys (I just thought we were giving you an official mailbox for the fun tradition) is that they donate $1 for every letter to Santa that is placed in these big, red mailboxes. Knowing that by sending a letter with your wishes would help make someone else's wishes come true, made our tradition that much sweeter for me this year.

I love you so,
Mommy

Tuesday, December 9, 2014

Best Cookie Recipes Ever

Dear Em,
We did a lot of baking this weekend (we were actually supposed to do a little more but you were a little under the weather by the end). I'm not much of a baker. I can do cooking for the most part. You put ingredients together & taste as you go, adding flavor when things don't seem quite right. Baking is harder for me. You put everything together & have no idea how the ingredients are going to come together until it bakes in the oven. After all the time spent putting your creation together, it can totally turn into a flop...& I've had a lot of flops. Most of my baking either doesn't look quite right or just tastes ehhh (maybe it has something to do with my Italian style of measuring).

So I was feeling really adventurous when I decided we would bake three different kinds of cookies that we had never attempted before: Chocolate Chip Cookies with Sea Salt, White Chocolate Peppermint Cookies with Vanilla Salt, & Oatmeal Pecan Cookies. I just discovered the website, Not Without Salt, & every recipe sounds so yummy, I want to try baking everything. I narrowed it down to three different types of cookies. The recipes looked pretty simple, with a small, unique twist in each. I was really hoping I could pull them off, because they sounded absolutely incredible online.

You are always in the mood to bake & gladly put your apron on, pulled up your chair to stand on, & set to work with me. Baking with you typically means there will be a mess...everywhere. This time was no different. When I ask you to stir gently, I am reminded every single time that you have no concept of the word gentle. Flour & dough covered our entire kitchen...on the counter, on the floor, on the cabinets, all over your face.


It was your job to crush the candy canes. You used a ladle, & I wasn't absolutely sure if you were trying to crush them or kill them. It was actually really hilarious. We had so much fun.


We made the three different doughs, & baked a batch of each cookie as we went along. Oh Em Gee. These cookies were amazing. I'm pretty sure these are the only kinds of cookies I will ever bake in the future. They're the kind of cookies that have the crust on the outside but are still gooey on the inside (my favorite). The chocolate chip cookies were extra chocolaty (yours & Daddy's favorite). Each cookie had a dash of sea salt (all of our favorites). They were so good.


We saved the extra dough & let you & your little best friend put the dough on the cookie sheets the next day. You two were the most adorable little bakers. I was happy to pay you for your hard work in cookies. You two were happy with the arrangement too.


Although we typically leave decorated sugar cookies for Santa on Christmas Eve, we all agree that he would much rather enjoy a few of these cookie this year. I am sure I have a little baking assistant who wouldn't mind helping me bake up a few more batches.

I love you so,
Mommy

Recipes From Not Without Salt...


Chocolate Chip Cookies with Sea Salt

Ingredients:
- 2 sticks of butter (8oz)
- 1/4 cup white sugar
- 1/4 cup turbinado sugar
- 1 & 3/4 cups light brown sugar, packed
- 2 eggs
- 2 tsp vanilla
- 3 & 1/2 cups all-purpose flour
- 1 & 1/2 tsp baking soda
- 3/4 tsp salt
- 1 lb chocolate (I used chocolate chips)
- 1/2 teaspoon sea salt, for sprinkling on top before baking

Cream the butter and the sugars until very light and fluffy, about 5-7 minutes on medium high. Scrape down the side of the bowl. Continue mixing while adding the eggs one at time. Make sure each egg is incorporated before adding the next. Add the vanilla. Scrape down the bowl with a spatula. Combine the flour, soda and salt in another bowl. With a whisk to combine. With the machine on low, slowly add the flour. Mix until just combined, taking care not to over mix. With a spatula fold in the chocolate.

If you so choose, and I do recommend that you do, sprinkle a very fine dusting of good quality sea salt.

Bake at 360* for 12 minutes. They should be lightly golden on the outside but still look gooey on the inside.


White Chocolate Peppermint Cookies with Vanilla Salt

Ingredients- 1/2 cup unsalted butter at room temperature
- 2 tbs granulated sugar
- 2 tbs turbinado sugar
- 3⁄4 cup plus 2 tbs packed dark brown sugar
- 1 egg, at room temperature
1 tsp vanilla extract
1 & 3⁄4 cups all-purpose flour
3⁄4 tsp baking soda
1⁄2 tsp kosher salt
1 cup white chocolate chips
2 tablespoons /30 g crushed peppermint candies or candy canes (I added a little more)
Vanilla salt, such as Jacobsen, for finishing (we couldn't find this & just used sea salt)

In a medium bowl, cream the butter and sugars together with an electric mixer on medium speed, until light in color and texture, 5 minutes. Scrape down the sides of the bowl with a rubber spatula as needed. Add the egg and vanilla and mix well to combine. Again, stop the machine and scrape down the bowl with a spatula.

In a medium bowl, whisk the flour, baking soda, and salt to combine.

With the mixer on low, slowly add the flour mixture. Mix until streaks of flour still run throughout. Add the chocolate and peppermint candies then mix until everything just comes together. Finish the dough by hand, taking care to scrape the sides and the bottom of the bowl to make sure everything is evenly distributed.

At this point, it is best to refrigerate the dough for 24 hours. When ready to bake, preheat the oven to 360°F. Line two baking sheets with parchment paper. Scoop the dough onto the baking sheets. Top the cookies with a pinch of vanilla salt just before baking.

Bake for 10 to 12 minutes. Rotate the sheets halfway through if they appear to be baking unevenly. The cookies should be lightly golden on the outside but still look quite gooey on the inside. Let the cookies cool on the baking sheets for at least 5 minutes. Makes 18-24 cookies. These are best eaten the day of baking but will keep, if well sealed, for up to 2 days.

Oatmeal Pecan Cookies

Ingredients:
- 1/2 cup butter, soft
- 1/2 cup sugar
- 3/4 cup brown sugar
- 1 tbs vanilla extract
- 1 tbs whole milk
- 1 large egg
- 3/4 cup all-purpose flour
- 1/2 tsp baking powder
- 1/2 tsp kosher salt
- 1/4 teaspoon cinnamon
- 1 & 1/4 cups oats
- 1 cup chopped, toasted pecans (I added more)
- 1 & 1/2 cups bittersweet chocolate chips (optional)

Cream the butter and sugars until light and fluffy. Add the egg, milk and vanilla. Mix until well incorporated. Add all the dry ingredients, including pecans and chocolate and mix until combined. Scoop even size balls of dough (about 1 tablespoon size) on a cookie sheet lined with parchment paper. Bake at 325°F for 10-12 minutes, or until golden brown. Makes 24 Cookies.
Related Posts Plugin for WordPress, Blogger...