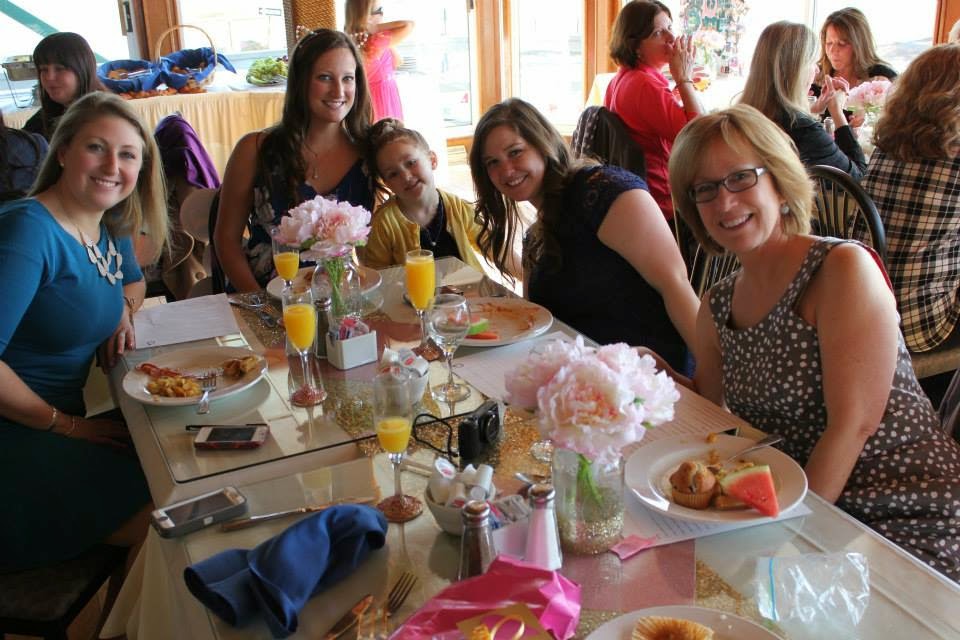
Continuing with our Pink & Glittery Wedding Shower posts, I want to tell you about the mason jar centerpieces we created. Mason jars seem to be pretty trendy now, & understandably so. They're functional. They're inexpensive. They're a little bit rustic. The ladies (these ladies totally rock, I've had so much fun making fun things with them) I planned the shower with were Pinterest pros (I've tried to stay away from it to avoid adding another addiction to my ever growing list of online addictions), & they found a few mason jar pins that we all loved. Glammed up mason jars with pink & gold glitter seemed like the perfect centerpieces for Aunt Andrea's shower.
First we shopped around for the mason jars. They carry them in so many different locations, & I think at the time they were cheapest from KMart. One of the girls ordered them & shipped them to my house so that we could work our magic during our wedding shower project weekend (I have so many fun projects to share with you from that weekend). We all worked on different projects, & glitterfying the mason jars became one of my tasks.
I was a little nervous. This was not something I had done before. We had seen a few DIY posts on how to create glittery mason jars, & most people seemed to use Mod Podge. I had never really used Mod Podge before & bought both a spray & regular bottle (I had no idea what the difference was). Gold & pink were our theme colors, & I bought a large variety of glitter in those hues (& silver just in case). I wasn't sure how exactly the project would work, & I bought everything that I might need, in hopes I could return anything I didn't use.
Here's what I actually needed:
- Original Mod Podge
- Spray Can Mod Podge
- Gold & Silver Glitter
- Sponge Paint Brush
- Mason Jar
- Bowl
- A large piece of card board or mat (to keep the mess confined)
 |
| Our Work Space |
Because we weren't covering the whole jar with glitter, the regular Mod Podge was a better choice. The regular Mod Podge & a paint brush enabled me to paint the straight lines I wanted. I dipped my paint brush into the Mod Podge & generously coated the glass a quarter of the way up all the way around the jar (leaving the bottom of the jar blank). I placed the jar in the middle of the glitter bowl, pressing the Mod Podged surface firmly into the glitter & rotating the jar until the Mod Podge was covered in glitter. Then I set the jar to dry. I repeated for each jar.
When the jars dried, we loved the glitter look. We loved it so much, we added glitter to the stems of champagne glasses as well (and maybe one of our iPhone cases). Still, without any type of clear coat over top of the glitter, we worried that glitter would be falling off everywhere. I was worried that if we tried to paint a coat of Mod Podge over the glitter, I was just going to make a sticky mess. That's where the Mod Podge spray can came in. I took the mason jars out to the garage & placed them on top of a big piece of cardboard. I sprayed the glittery area of each jar, making sure to rotate the jar & cover all the glitter. Then I waited 15 minutes for the spray to dry before applying a second coat. It worked great. We had glittery glam that would stay in place instead of making a big mess.
We really wanted to place pretty, pink flowers in the jars as a final touch, but most of the flowers I saw at craft stores were wicked expensive. We were on the verge of switching to a more affordable floating candle option, when I found flowers at Walmart (of all places). They were exactly the look we were going for, for just the right price. We filled each jar with three flowers. For a little extra pop of pink & sparkle, we bought glittery craft paper to place underneath the glass overlay on the venue's tables.
When we put everything together, I got really excited. It was perfect, & so fun to finally see our hard work come together for one of our favorite girls. You were in love with our pink & glitter theme from the very beginning & swooned at the site of the pretty centerpieces. One of the best parts was that we all loved the centerpieces so much, we were happy to take a couple with us for continued use in our homes. I'm confident that you won't have any trouble finding use for our pink & glittery mason jars.
Plus, now we have Mod Podge, & I know how to use it. The crafting possibilities are endless!
I love you so,
Mommy


I love mason jars! Since pinterest began,mason jars becomes popular again. It has so many uses and very classic.
ReplyDeleteThanks, I agree. I guess, thanks to Pinterest too!
ReplyDelete