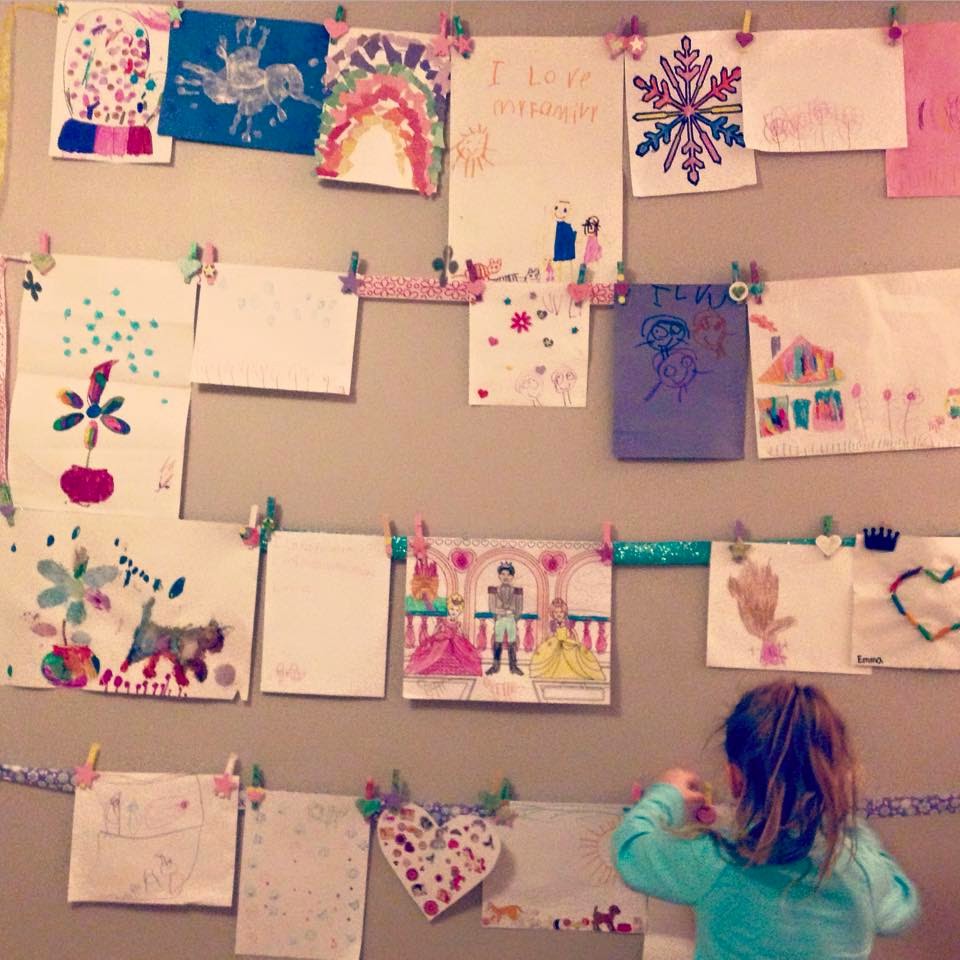
Remember how you made yourself a wall to tape up your artwork? Growing up, my mom never even let me tape a poster on my bedroom wall. As a result, I've never been a poster-wall-taping person either. Your taped artwork all over your bedroom wall irked me in a way that only a non-poster-wall-taper would understand (although, we did use painters tape so that the walls wouldn't be damaged). Plus, when we took your artwork down from the walls, it sometimes ripped & got damaged from the tape that had held it on the wall. I was determined to find a better solution to your ever growing artwork display problem.
I was also determined to find a project for us to tackle. There's been so much snow in New England (2 blizzards & multiple other snow days in less than a month), & we've been feeling a little cooped up. Project Make an Art Wall was exactly what you & I needed.
We Used...
- 4 rolls of ribbon
- Wooden clothes pins
- Small flat wooden shapes (hearts, stars, circles)
- a smock & drop cloth (we used a garbage bag)
- assorted paints
- paint brushes
- hot glue gun
- 8 nails
- hammer
We started at the craft store. You & I picked out four different rolls of ribbon in different colors & patterns that would go along with the color scheme of your room. Next we headed to the wooden aisle. We grabbed 40 clothes pins & picked out bags of fun, flat wooden shapes.
Once we got home, I laid a garbage bag across your little white table, put your smock on you, & got out our paints & paint brushes (we keep a box of acrylic paints that we've used for various other projects). You then spent close to two hours happily painting the clothespins & wooden shapes. Daddy & I were pretty excited that your independent painting project gave us over an hour to ourselves. It was parents of a single child paradise to know that you were absolutely content...on your own. That is until we found paint everywhere (it was on chairs, on the wall going up the stairs, on the floor). Oh, well, you win some & you lose some.
I helped you finish up your painting, both because you needed a little help with the number of items that needed painting (I think we painted 40 clothes pins) & someone needed to eliminate some of the excess paint that was oozing off some of the wooden items. You did a really great job, & we set aside all the wooden pieces to dry.
Then we headed upstairs with a hammer & nails. I hammered in one nail on the left side of your wall, a couple inches down from the ceiling. I then measured 17 inches (the height of your tallest pictures) down from the first nail, & hammered in another nail there. I hammered in two more nails, each one directly 17 inches below the one above it. I repeated the same thing on the right side of the wall. I tied the first ribbon tightly (leaving as little slack in the ribbon as possible) to the two top most nails & the next ribbon to the two nails below. I did this until there were four straight lines of ribbon tied to the eight nails.
By then, the wooden clothespins & shapes had dried. I used the glue gun to decorate the clothespins with the shapes you had painted. I let you pick out which shape would go on which clothespin & then glued the shapes to the clothespins. You had a blast decorating your clothespins. I have to say, they looked so much more amazing than the plain wooden pieces we first started working with.
I had piled your artwork on the bed, & the two of us used the clothespins to hang up your many works of art. You can't yet reach the top ribbon, & I hung the artwork up there. You worked on filling up the rest of the ribbon pieces. When we were done, you clipped all your remaining clothes pins to a short amount of ribbon that hangs from the nails.
We spent less than $25, & we were both absolutely thrilled with the result. As we read together in your bed that night, it made my heart so happy to see what was once mostly a blank wall filled with your colorful & unique artwork. Plus, nothing was taped to the walls!!
It's been a little over a week since we created your art wall together, & if you can believe it, it's even more full of art than it was when I took these photos. You've also hung up photographs & some of the Valentines you received. What was once a plain, grey wall has become a wall that you can display things that make you happy, & that makes me wicked happy. I hope as you grow, your wall will continue to be a bright spot in your room. Perhaps you will continue to hang your art work & also pin inspirational quotes & pictures with your gal pals. I'm excited to see what you continue to make of this wall, because if it's anything like you it will be ever growing & changing & nothing less than absolutely amazing.
I love you so,
Mommy


No comments:
Post a Comment
While my letters are addressed to Em, we enjoy hearing from all our readers. Comments are always welcome. The ideas, inspiration, & support we get from other readers is one of the reasons I write. I try to respond to all comments. If you click the "subscribe by email" button underneath the comment box, you will get notifications when I have replied. Thank you for stopping by!